How to Removing and Installing Switch Module For Driver Side Window Lift on VW Bora
This instruction will show you guide on how to removing and installing switch module for driver side window lift on Volkswagen Bora 2006.
Preparation:
VW ODIS 7.2.1 & 5.2.7 Diagnostic Software Free Download
[08.2021] VW ODIS 7.2.1 All Brands & ODIS-E 12.2.0+KG Installation+Instruction
Procedures:
Special tools required
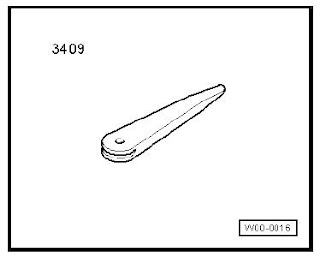
Removal wedge - VAS 3409
When removing and installing components in visual area (connectors, covers, trims etc.) apply a commercial adhesive tape where a lever tool is applied ( removal wedge -VAS 3409- , srewdriver).
The following components (in models with 4 doors) are integrated into the switch module for the driver side window lift:
Front left window regulator switch -E40-
Rear left window regulator switch, in driver door -E53-
Rear right window regulator switch, in driver door -E55-
Front right window regulator switch in driver door -E81-
Childproof lock button -E318-
Button illumination bulb -L76-
Note
In the event of repair, the complete component must be renewed.
The following components (in models with 2 doors) are integrated into the switch module for the driver side window lift:
Front left window regulator switch -E40-
Front right window regulator switch in driver door -E81-
Button illumination bulb -L76-
Note
In the event of repair, the complete component must be renewed.
Removing:
– Switch off the ignition and all electrical consumers.
– Carefully lever installation frame out of door trim using removal
wedge -VAS 3409- or screwdriver -arrow-.
Remove connectors - arrows-
Release locking lugs -arrows- and remove switch from the installation frame.
Installing:
Install in reverse order of removal.


Comments