Tips to Prepare Your Wall for Tiling with a Professional Tiler
Ceramic tiles are used in most apartments, buildings, offices and residences. They are applied to any flat, solid, and clean surface to support their weight. This includes plaster, cement render, fibre cement sheets, and plasterboard. Surfaces such as metal, old tiles and wood can also be tiled over with the right preparation.
It’s important to note that you should never tile over a wall that’s covered in wallpaper or any surface that might detach from the base wall. Remember, the quality of your tiled wall depends on the condition of the surface it’s on. If you are uncertain, consult with Brisbane wall tilers before beginning.
For tiling a shower wall, check out the post step by step.
Tools and Equipment You Need
- Personal Protective Equipment (PPE) like goggles, respirators/dust masks and gloves.
- Dust sheet
- Sugar soap for cleaning walls with a lot of grim
- Snader or sandpaper
- Hammers or pliers for removing nails, screws and hooks
- Filler for plaster, cement setting or render, depending on the type of wall
- Trowel
- Scraper or streamer for stripping off old wallpaper
- Cement sheeting for your wall’s base.
- Sponges and clothes
- Step ladder or ladder
- Primer
Now, let’s dive into the steps for preparing your wall:
Step 1: Professional tilers in Brisbane
Recommend removing any screws, photo hooks, nails or other fixtures from the wall. Give it a thorough clean, ensuring it’s free from dust, flaking paint, dirt or powders.
If the wall is brand new, make sure the cement’s curing times have passed. Tiling on a new surface too soon could cause movement in the underlying material, ruining your DIY tiling project.
If the wall is painted, avoid using a paint stripper, as it can affect the tile primers and adhesives. Instead, roughen the surface by sanding, then remove any flaky paint or dust and let it dry.
If the wall has wallpaper or any other surface that’s not directly attached to the base wall, remove the wallpaper or the surface. If you’re unsure, consult with Professional Tilers in Brisbane before proceeding.
Step 2: Optimal Time
After ensuring your wall is clean, dry and sturdy, it’s crucial to prime it. This step helps establish a strong connection between the wall and the adhesive for your tiles.
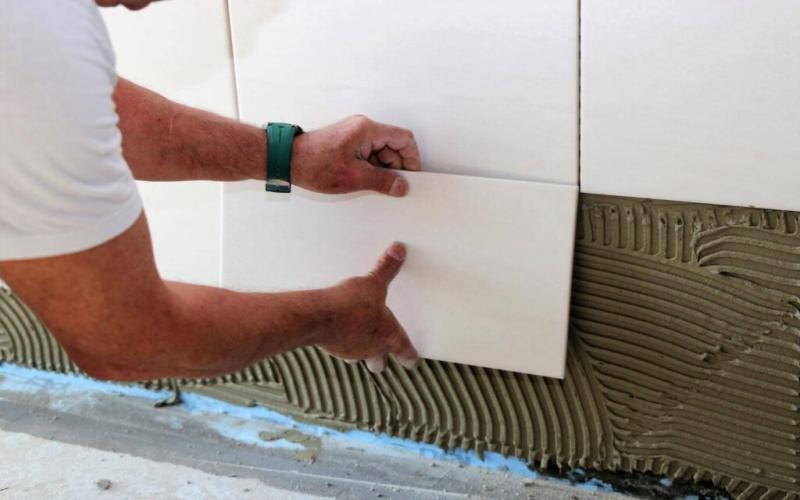
Step 3: Time for Tiling
After finishing these steps and allowing the primer to dry, you are all set to begin tiling your wall. For a more unified look, it’s recommended to lay your wall tiles after the floor tiles, so ensure your flooring is finished before tackling the wall.
Getting the first row of tiles right is essential, as this will dictate the outcome of the rest of your wall.
If you find this piece useful, share it with your loved ones!


Comments